We are all neat freaks. Yes, even those people who claim not to be! We can see this in Power BI users all over the world. How do I know? Well, we all want to see equal column widths in a matrix visual.
Look at the screenshot below; it makes you feel a bit uncomfortable, doesn’t it? You desperately want the column width to be consistent. See, I said you were a neat freak.
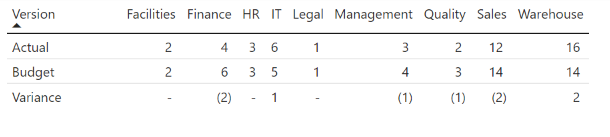
In Excel, this type of formatting is easy. The grid structure provides an easy way for us to set equal column widths. But Power BI isn’t restricted by a grid layout. It is this flexibility that provides us with a bit of a challenge.
In Power BI, we can drag the column edges in an attempt to make them look equal. This is a fool’s errand of constantly re-adjusting because it never looks right.
In this post, I want to show you an easy method to get column widths evenly spaced.
Table of contents
- Create a spacing measure
- Adding the measure to the matrix visual
- Remove the column width measure
- What if columns expand later?
Create a spacing measure
Let’s start by creating a measure that contains only text. The width of this measure will become the width of our columns. So, make sure the text is wide enough to prevent cut-off or word wrapping.

The measure in the image above is:
Column Width = "xxxxxxxxxxxx"Unless you’re using a monospaced font, there is no point in counting characters. W is wider than I in most fonts, so it will never be exact. Don’t sweat it too much; if you get it wrong, we can easily change it later.
TIP:
For more control over column widths, use a thin character such as a pipe ( | ).
Adding the measure to the matrix visual
Now it’s time to make use of the measure we created above.
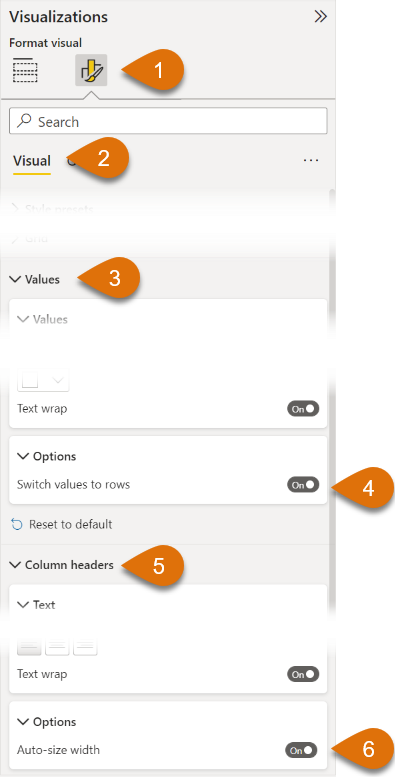
In the Visual section of the Format Visual pane [1],[2] set the following:
- Values > Options > Switch values to rows > On [3],[4]
- Column headers > Options > Auto-size width > On [5],[6]
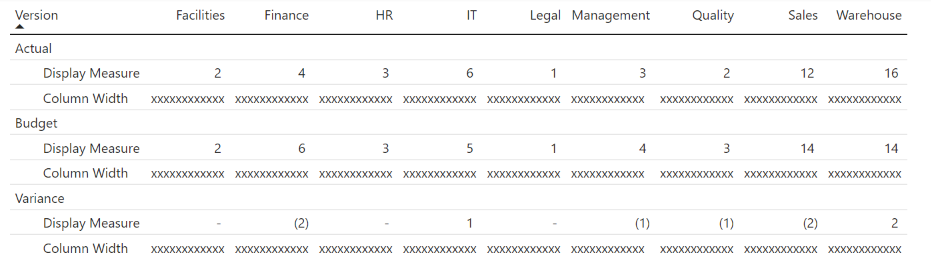
Next, drag the new measure into the Values section of the matrix visual.
If the text in the Columns Width measure is wider than your widest column, every column will resize to be evenly spaced.
If you’re not happy with the widths, go back and edit the measure, adding or removing characters as necessary.
Remove the column width measure
With the columns all set at an equal width, we now want to turn off the auto-resizing of columns. This is simply reversing the setting we applied above.
Finally, remove the Column Width measure from the matrix visual.
Ta-Dah! The column widths remain the same size, and your inner neat freak is happy.

What if columns expand later?
You’re probably wondering what happens if you set equal column widths, but the headings become wider on a future refresh. In regard to this, there are two things to note:
- Any wider columns are resized, but not all columns.
- The wider column resizes back down to the correct size when it becomes smaller again.
There are two options we can consider here:
- Set the column width to be wider than the current data and hopefully wide enough for future data too.
- Be prepared to redo the steps above.
I admit, this is not a perfect solution, but it is still significantly better than dragging individual columns and hoping to get it pixel perfect.
Other resources
The screenshots in this post contain negative numbers in brackets. Find out how to achieve this here: 3 ways to show negative numbers in brackets in Power BI.
The REPT function can create the Column Widths measure. Check out this method here: Set Fixed Column Width in Matrix in Power BI.